Hey makkals,
This post is a part of a multi-part series on WebAssembly. Check out other parts of the series here
Alrighty! We have now learned the theoretical basics and even built a small practical application with WebAssembly. Let’s step it up and try to build an application around a native library and see how that goes.
In this post, we will build an application that uses a famous multimedia library named FFmpeg. It is written natively in C++. Since we have the Emscripten tool, we can port this library to the web easily.
So, let’s build an application that converts a video to GIF all without leaving the browser!
NOTE: We are not going to compile the FFMPEG library in this post. We would rather use a pre-compiled version which is widely adopted in the industry
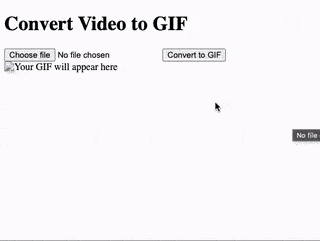
Here’s a quick preview of the application we’ll build.
Setup
Before starting, we have to set up ffmpeg WASM in our project. Luckily someone has already done the heavy lifting of compiling the whole C++ FFMPEG library to WASM. We are going to use the ffmpeg.wasm project. All we have to do is now to download and link the glue-code in our project to start using it.
Download and extract the following tarball - https://registry.npmjs.org/@ffmpeg/ffmpeg/-/ffmpeg-0.12.15.tgz
Move the extracted directory into the project folder.
Create an HTML file with the following markup.
<body>
    <h1>Convert Video to GIF</h1>
  <input type="file" id="videoInput" accept="video/*">
  <button id="convertButton">Convert to GIF</button>
  <br>
  <img id="gifOutput" src="" alt="Your GIF will appear here" />
</body>
Integrate ffmpeg.wasm
The ffmpeg.wasm can be used as a module. It means, we can use ES6 imports to import the library like follows,
<script type="module">
    import * as ffmpegLib from './package/dist/esm/index.js';
</script>
Let’s create a new instance of FFMPEG right away and load the WASM.
<script type="module">
    import * as ffmpegLib from './package/dist/esm/index.js';
    const ffmpeg = new ffmpegLib.FFmpeg();
    ffmpeg.load();
</script>
Note that the ffmpeg.load() is an async function. To keep the example simple, I’m not handling the asynchronous part. So if you’re trying the same code, give the application a couple of seconds before trying to convert video.
Let’s set up necessary DOM identifiers so that we can operate with DOM easily.
<script type="module">
    import * as ffmpegLib from './package/dist/esm/index.js';
    const ffmpeg = new ffmpegLib.FFmpeg();
    ffmpeg.load();

    const videoInput = document.getElementById('videoInput');
    const convertButton = document.getElementById('convertButton');
    const gifOutput = document.getElementById('gifOutput');
</script>
Now let’s configure the event listener for the convert button and create a stub method.
async function convertToGif(videoFile) {
    // TODO: Implement
}

convertButton.addEventListener('click', async () => {
    const videoFile = videoInput.files[0];
    if (videoFile) {
    await convertToGif(videoFile);
    } else {
    alert('Please select a video file first!');
    }
});
Implement the conversion method
Now that we have everything setup nice and clean, it’s time to actually implement the conversion function.
Let’s read the file’s content as an array buffer.
const videoFileName = videoFile.name;
const fileReader = new FileReader();

const readFilePromise = new Promise((resolve, reject) => {
    fileReader.onload = () => resolve(fileReader.result);
    fileReader.onerror = reject;
});

fileReader.readAsArrayBuffer(videoFile);

const fileBuffer = await readFilePromise;
The glue code we imported manages memory under the hood for us. So we can just pass the usual typed integer array of data and the remaining will be taken care of automatically.
FFmpeg has its own internal file system. To process a file, we first need to write it into FFmpeg’s virtual file system, after which we can perform operations on it.
Luckily for us, the glue-code gives us a method writeFile to do exactly that.
await ffmpeg.writeFile(videoFileName, new Uint8Array(fileBuffer));
After writing the file that we need to operate, we can pass parameters to ffmpeg that define our operation.
Note that FFMPEG is essentially a CLI tool. But it can also be used as a typical library. However, the glue-code gives us a way to operate like a CLI interface. It is more easier than juggling between multiple functions exposed by FFMPEG.
await ffmpeg.exec([
    '-i', videoFileName,       // Input file
    '-vf', 'fps=10,scale=320:-1', // Video filter: 10 frames per second, width 320px (height auto)
    '-c:v', 'gif',             // Output format: GIF
    'output.gif'               // Output file name
]);
The above command, obviously, converts a video file into GIF. I added comments describing every option.
FFMPEG performs the operation and writes the result to its internal file system. So we have to read the file from its memory. In our case the filename is output.gif.
As we had a function to write a file, we also have a function to read from the file system.
const data = await ffmpeg.readFile('output.gif');
The data variable contains raw bytes in it. To display it we have to convert it into object URL.
const gifBlob = new Blob([data.buffer], { type: 'image/gif' });
const gifUrl = URL.createObjectURL(gifBlob);
And finally, set this URL as the source of our <img /> element so that we can see the GIF play.
gifOutput.src = gifUrl;
This time, we don’t have to take care of garbage collection or anything. Everything is well handled by the WASM file and the glue-code.
Putting it all together
<body>
    <h1>Convert Video to GIF</h1>
    <input type="file" id="videoInput" accept="video/*">
    <button id="convertButton">Convert to GIF</button>
    <br>
    <img id="gifOutput" src="" alt="Your GIF will appear here" />

    <script type="module">
        import * as ffmpegLib from './package/dist/esm/index.js';
        const ffmpeg = new ffmpegLib.FFmpeg();
        ffmpeg.load();

        const videoInput = document.getElementById('videoInput');
        const convertButton = document.getElementById('convertB`utton');
        const gifOutput = document.getElementById('gifOutput');

        async function convertToGif(videoFile) {
            const videoFileName = videoFile.name;
            const fileReader = new FileReader();

            const readFilePromise = new Promise((resolve, reject) => {
                fileReader.onload = () => resolve(fileReader.result);
                fileReader.onerror = reject;
            });

            fileReader.readAsArrayBuffer(videoFile);

            const fileBuffer = await readFilePromise;

            await ffmpeg.writeFile(videoFileName, new Uint8Array(fileBuffer));

            await ffmpeg.exec([
                '-i', videoFileName,       // Input file
                '-vf', 'fps=10,scale=320:-1', // Video filter: 10 frames per second, width 320px (height auto)
                '-c:v', 'gif',             // Output format: GIF
                'output.gif'               // Output file name
            ]);

            const data = await ffmpeg.readFile('output.gif');

            const gifBlob = new Blob([data.buffer], { type: 'image/gif' });
            const gifUrl = URL.createObjectURL(gifBlob);

            gifOutput.src = gifUrl;
        }

        convertButton.addEventListener('click', async () => {
            const videoFile = videoInput.files[0];

            if (videoFile) {
                await convertToGif(videoFile);
            } else {
                alert('Please select a video file first!');
            }
        });
    </script>
</body>
Conclusion
Alright, we built an application with a native library that just works within the browser. We can now truly see what WebAssembly can bring to the web. Previously such media operations required a server to handle. But we were able to build a converter all without leaving the browser.
You can get the source code of this project from this repository - https://github.com/djhemath/Webassembly-demos/tree/main/video-to-gif
Stay tuned for more content on WebAssembly!